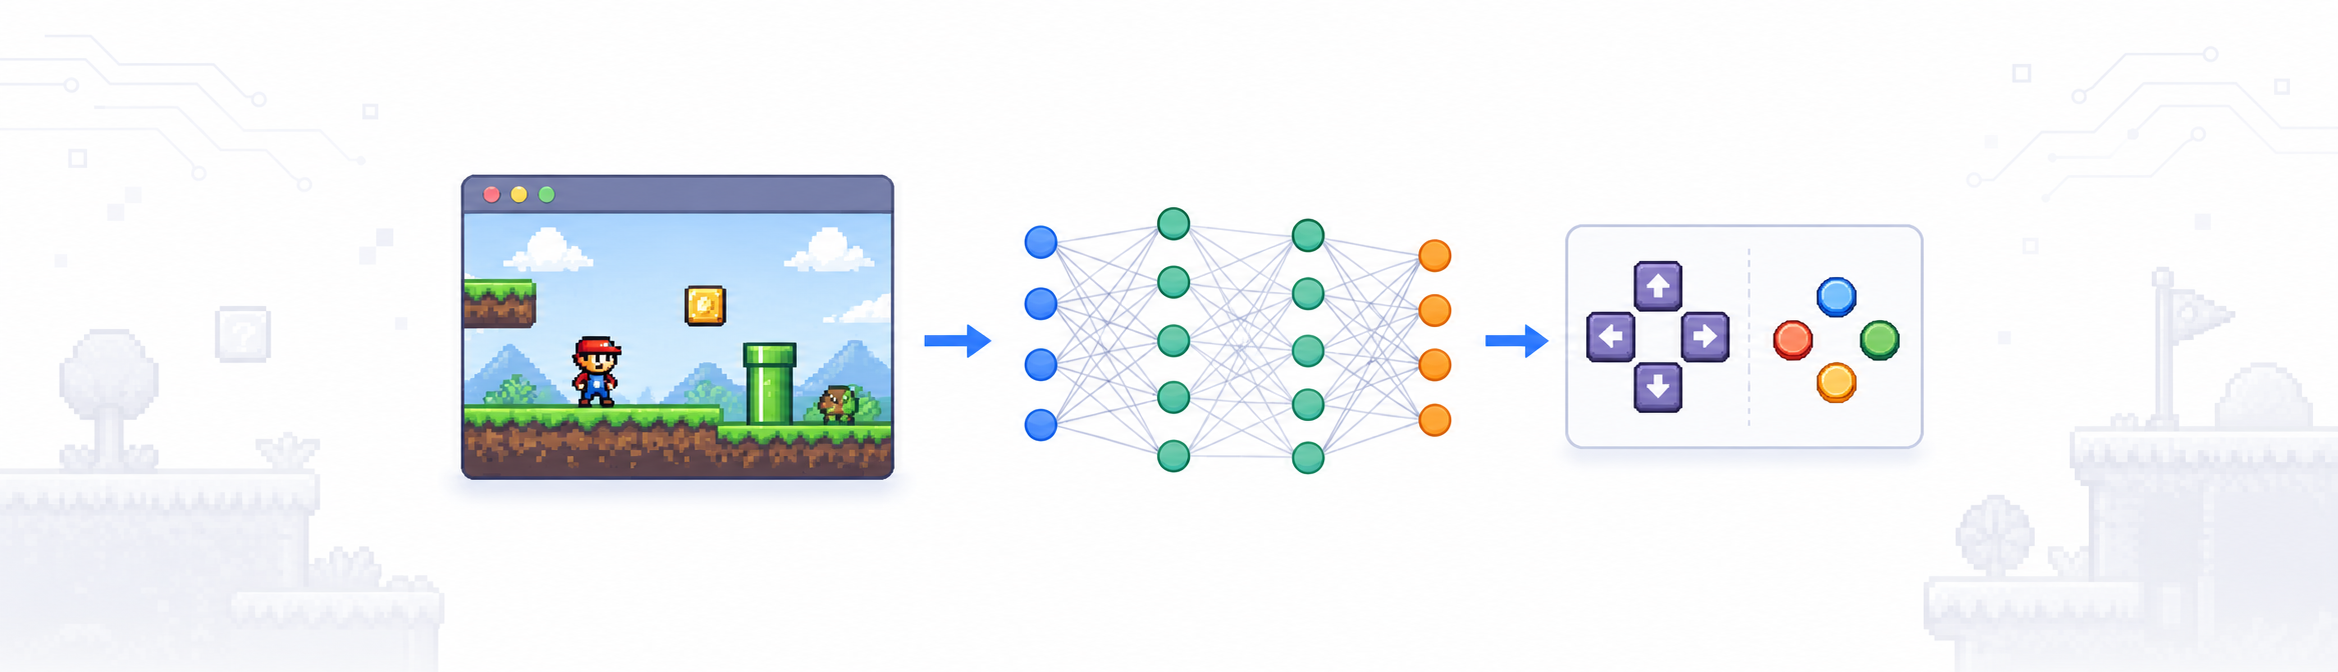
In Part 1 we read Mario’s position from memory and drew a HUD overlay. Now we’re going to make Lua press buttons, save the game state, and run Mario through the level automatically.
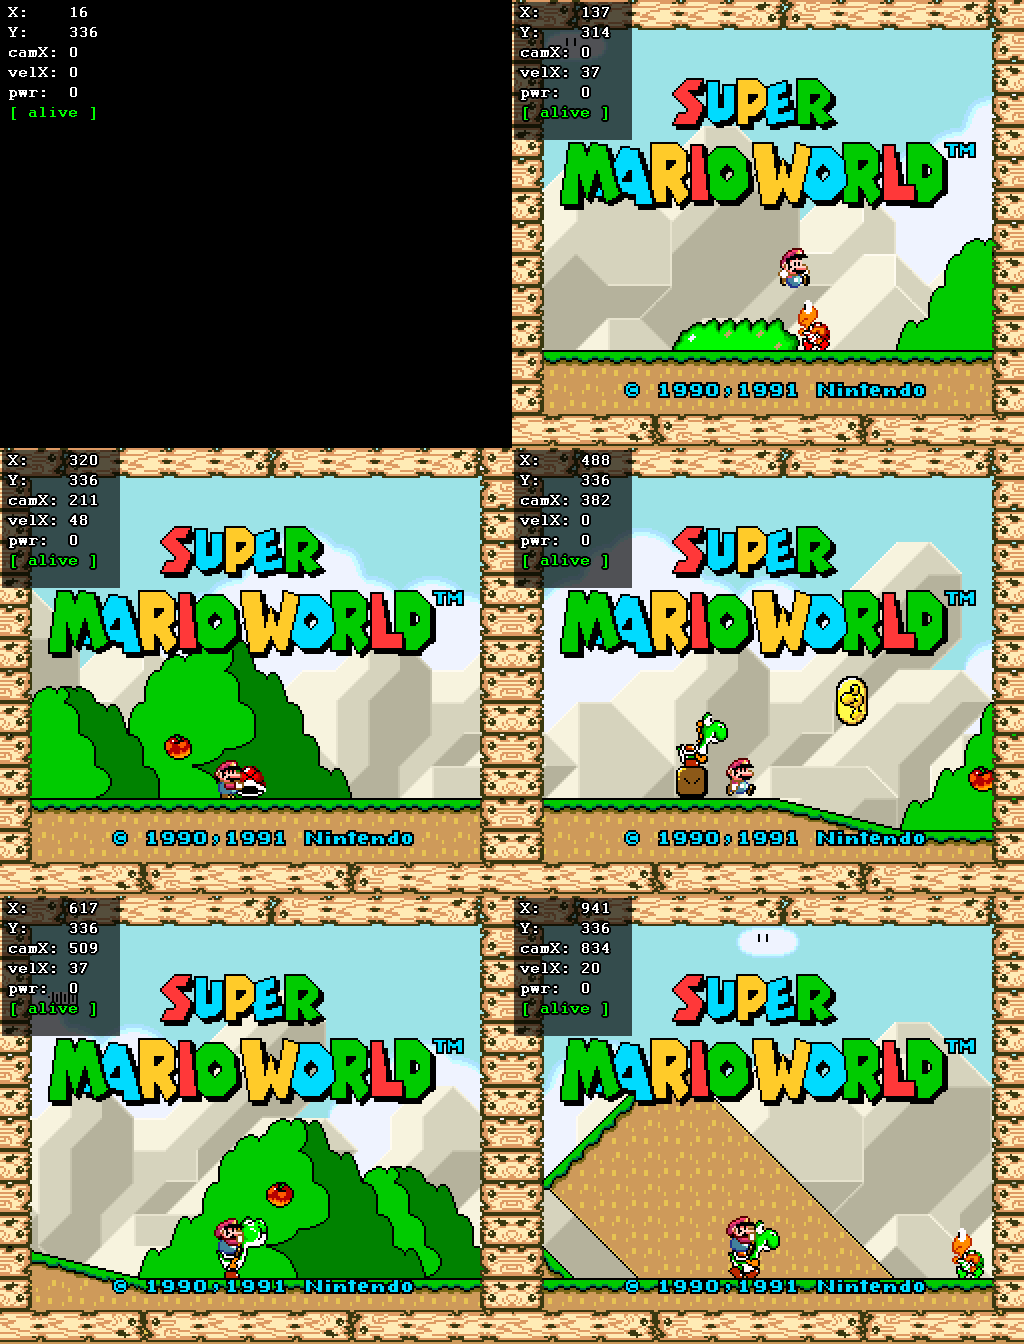
By the end of this post your script will:
- Save Mario’s position at the start of Yoshi’s Island 2
- Run an episode where Mario walks to the right on his own
- Measure how far he got before dying
- Reset and do it again, printing results to the console
This episode loop is the foundation everything else in the series builds on.
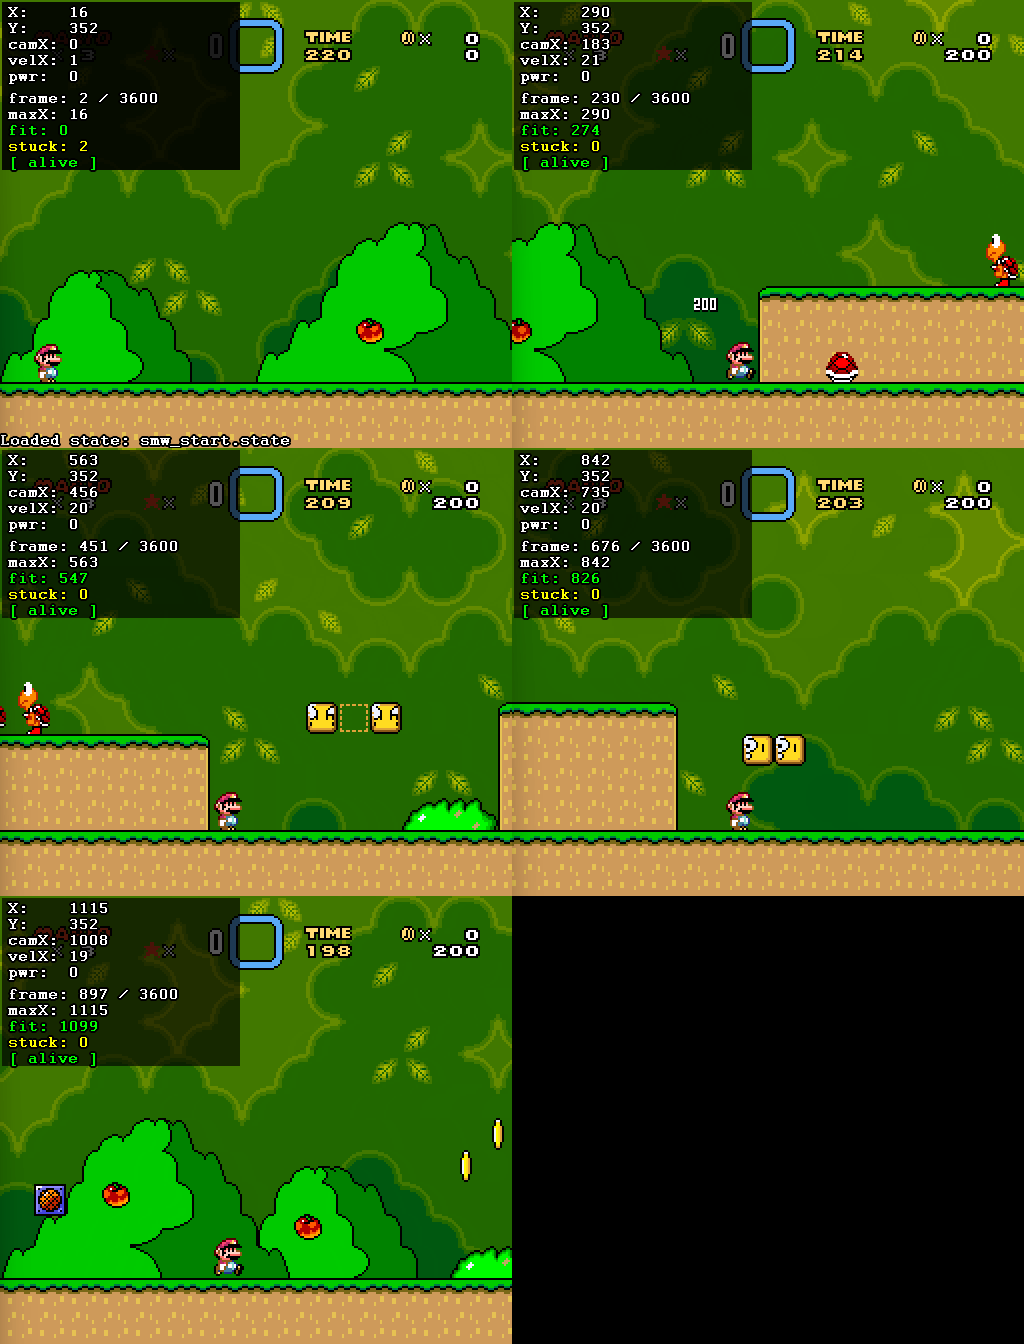 Not exactly impressive, but the loop is working. Mario jumped, walked, died, and we measured his progress.
Starting point
We’re building on the script from Part 1. Open SuperMarioWorld_ai.lua. It should look like this:
-- smw_ai.lua  -  Part 1: complete script
print("script started")

event.onframeend(function()
    local marioX       = memory.read_s16_le(0x94, "WRAM")
    local marioY       = memory.read_s16_le(0x96, "WRAM")
    local isDead       = memory.read_u8(0x71,    "WRAM") == 0x09
    local xVelocity    = memory.read_s8(0x7B,    "WRAM")
    local cameraX      = memory.read_s16_le(0x1A, "WRAM")
    local powerUpState = memory.read_u8(0x19,    "WRAM")

    local bg = 0xAA000000
    gui.drawBox(0, 0, 120, 85, 0x00000000, bg)
    gui.text(8, 4,   string.format("X:    %d", marioX),        "white")
    gui.text(8, 20,  string.format("Y:    %d", marioY),        "white")
    gui.text(8, 36,  string.format("camX: %d", cameraX),       "white")
    gui.text(8, 52,  string.format("velX: %d", xVelocity),     "white")
    gui.text(8, 68,  string.format("pwr:  %d", powerUpState),  "white")
    gui.text(8, 104,
        isDead and "[ DEAD ]" or "[ alive ]",
        isDead and "red" or "lime")
end)
In Part 1, event.onframeend ran our code automatically every frame. For training, we need to drive the emulator ourselves: step one frame, check what happened, and decide what to do next.
We’re going to adapt this script step by step. First, we’ll restructure this code to add our control loop.
Step 1: Refactor Part 1 into helpers
In this step, we encapsulate the Part 1 behavior into two helper methods:
readState()reads WRAM values and returns them in one data object.drawHud(st)draws the overlay from that data object.
We want one place for state-reading logic and one place for HUD-rendering logic. Replace your Part 1 callback with this refactor:
-- smw_ai.lua  -  Part 2: refactor helpers
print("script started")

local function readState()
    return {
        marioX       = memory.read_s16_le(0x94, "WRAM"),
        marioY       = memory.read_s16_le(0x96, "WRAM"),
        isDead       = memory.read_u8(0x71,    "WRAM") == 0x09,
        xVelocity    = memory.read_s8(0x7B,    "WRAM"),
        cameraX      = memory.read_s16_le(0x1A, "WRAM"),
        powerUpState = memory.read_u8(0x19,    "WRAM"),
    }
end

local function drawHud(st)
    local bg = 0xAA000000
    gui.drawBox(0, 0, 120, 85, 0x00000000, bg)
    gui.text(8, 4,   string.format("X:    %d", st.marioX),       "white")
    gui.text(8, 20,  string.format("Y:    %d", st.marioY),       "white")
    gui.text(8, 36,  string.format("camX: %d", st.cameraX),      "white")
    gui.text(8, 52,  string.format("velX: %d", st.xVelocity),    "white")
    gui.text(8, 68,  string.format("pwr:  %d", st.powerUpState), "white")
    gui.text(8, 104,
        st.isDead and "[ DEAD ]" or "[ alive ]",
        st.isDead and "red" or "lime")
end

event.onframeend(function()
    -- Clear the previous frame's HUD
    gui.clearGraphics()
    gui.cleartext()

    local st = readState()
    drawHud(st)
end)
NOTE: When you modify the LUA script, save your changes then click the Refresh button in BizHawk’s Lua Console; this will force BizHawk to reload your changes.
After you make these code modifications, you shouldn’t see any change in the emulator.
Try commenting out the drawHud(st) line and notice that the HUD disappears when you refresh the script. I added the two methods clearGraphics() and cleartext() to clear the HUD rendered from the previous frame. Try commenting out these lines as well, to see the difference.
Step 2: Replace onframeend with a manual frame loop
Now we switch from callback-driven updates to a loop we control with emu.frameadvance(). This is the key training pattern.
Delete the event.onframeend(function() ... end) block and replace it with:
while true do
    -- Clear the previous frame's HUD
    gui.clearGraphics()
    gui.cleartext()

    local st = readState()
    drawHud(st)
    emu.frameadvance()
end
Save and refresh. You should still see the same HUD updating every frame. The behavior is the same, but now we’re stepping the emulator frames ourselves.
Step 3: Add episode boundaries
To train reliably, we need to limit how long each training episode runs. We’ll add two constants to control this:
MAX_FRAMES: prevents creates a hard limit on the duration of the training session.STUCK_TIMEOUT: gives up early if Mario doesn’t make progress, saving real world time if the training session gets stuck.
Add these constants under print("script started"):
print("script started")

local MAX_FRAMES    = 60 * 60  -- 60 seconds at 60fps
local STUCK_TIMEOUT = 60 * 5   -- give up if no forward progress for 5 seconds
At 60 fps, 60 * 60 is 3600 frames (60 seconds), and 300 stuck frames is 5 seconds.
Step 4: Add save state helpers
To measure fitness fairly, each episode needs to start from the same position. We add two helpers that save and reload the start state.
Add this below the constants:
local START_STATE = (os.getenv("USERPROFILE") or "C:/Users/Default") .. "/Documents/BizHawk/smw_start.state"
-- If BizHawk cannot find the or access this save file, replace the line above with a full path you control,
-- for example: local START_STATE = "c:/Users/YOUR_USERNAME/Documents/BizHawk/smw_start.state"

function saveStart()
    print("Using save state: " .. START_STATE)

    local ok, err = pcall(function()
        savestate.save(START_STATE)
    end)

    if ok then
        print("Saved start state.")
    else
        print("Save failed: " .. tostring(err))
    end
end

function loadStart()
    print("Loading save state: " .. START_STATE)

    local ok, err = pcall(function()
        savestate.load(START_STATE)
    end)

    if not ok then
        error("Could not load start state. Run saveStart() first. " .. tostring(err))
    end
end
Step 5: Create runEpisode skeleton
So far we’ve been running a simple manual loop. Now we’ll wrap that loop into a function so we can run multiple episodes and collect fitness scores. This function will be the core of our training loop.
Before we test runEpisode, we need to capture a starting position. Make sure Mario is standing at the very start of Yoshi’s Island 2, on the ground, with the level fully loaded (not mid-transition). In the Lua Console input at the bottom, type saveStart() and press Enter.
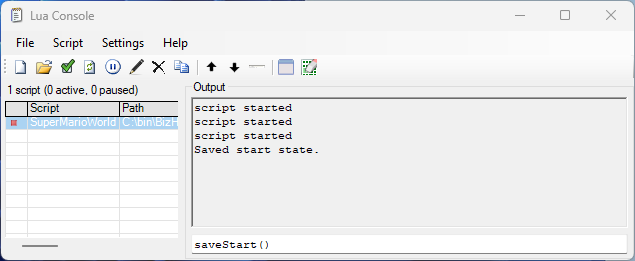 You should see the confirmation message in the console output. If nothing appears, make sure the script is refreshed and running first.
If you get attempt to call a nil value (global 'saveStart'), your loaded script does not define saveStart in the global scope yet.
Re-check Step 4 (it must be function saveStart(), not local function saveStart()), save the Lua file, click Refresh, and run saveStart() again.
Now add this function below drawHud:
local function runEpisode(buttonsFn)
    loadStart()

    local startX      = readState().marioX
    local maxX        = startX
    local stuckFrames = 0
    local deathFrames = 0

    -- we'll fill this loop in next
    for frame = 1, MAX_FRAMES do
        local st = readState()
        drawHud(st)
        emu.frameadvance()
    end

    return maxX - startX
end
This is an important function. This is our core training loop. It’s not complete and we’re going to spend a lot of time enhancing this function. For now, this code loads our starting state, initializes the observation variables, and then loops for the max number of frames.
Step 6: Move control into runEpisode
Now that we have a bounded episode function, we can remove the temporary infinite loop from Step 2. Control is now driven by calling runEpisode, not by a continuous loop.
Remove the temporary infinite loop from Step 2:
- while true do
-     local st = readState()
-     drawHud(st)
-     emu.frameadvance()
- end
Then add this temporary test call at the bottom:
local function idle(_state)
    return {}
end

local ok, err = pcall(function()
    local fitness = runEpisode(idle)
    print(string.format("Fitness: %d pixels", fitness))
end)

if not ok then
    print("Could not start episode: " .. tostring(err))
end
It won’t play well yet, but it runs one bounded episode and exits cleanly. At this stage it can run for up to about 60 seconds before returning, because stop conditions are added in the next step.
If you run the temporary test call above immediately after reloading the script, BizHawk will try to load the save state before it exists. Run saveStart() once first, then run the test call.
Step 7: Add progress, death, and stuck detection
The episode loop needs three stop conditions:
- Death detection: If Mario dies for 3 frames straight, the episode ends.
- Stuck detection: If Mario doesn’t advance for 300 frames, he’s stuck in an obstacle and the episode ends.
- Progress tracking: We track the furthest X position so far; fitness is the distance traveled.
Inside runEpisode, update the frame loop:
    for frame = 1, MAX_FRAMES do
        local st = readState()

        if st.marioX > maxX then
            maxX = st.marioX
            stuckFrames = 0
        else
            stuckFrames = stuckFrames + 1
        end

        if st.isDead then
            deathFrames = deathFrames + 1
            if deathFrames >= 3 then break end
        else
            deathFrames = 0
        end

        if stuckFrames >= STUCK_TIMEOUT then break end

        local buttons = buttonsFn(st)
        joypad.set(buttons, 1)

        drawHud(st, frame, maxX, startX, stuckFrames)

        emu.frameadvance()
    end
Then update drawHud to accept those values and render all metrics in one place:
local function drawHud(st, frame, maxX, startX, stuckFrames)
    local bg = 0xAA000000
    gui.drawBox(0, 0, 120, 85, 0x00000000, bg)
    gui.text(8, 4,   string.format("X:    %d", st.marioX),       "white")
    gui.text(8, 20,  string.format("Y:    %d", st.marioY),       "white")
    gui.text(8, 36,  string.format("camX: %d", st.cameraX),      "white")
    gui.text(8, 52,  string.format("velX: %d", st.xVelocity),    "white")
    gui.text(8, 68,  string.format("pwr:  %d", st.powerUpState), "white")
    gui.text(8, 90, string.format("frame: %d / %d", frame, MAX_FRAMES), "white")
    gui.text(8, 106, string.format("maxX: %d", maxX), "white")
    gui.text(8, 122, string.format("fit: %d", maxX - startX), "lime")
    gui.text(8, 138, string.format("stuck: %d", stuckFrames), "yellow")
    gui.text(8, 154,
        st.isDead and "[ DEAD ]" or "[ alive ]",
        st.isDead and "red" or "lime")
end
Now runEpisode has real stop conditions and produces a meaningful fitness score.
Step 8: Inject inputs and test
If you did not run saveStart(), this step will fail because loadStart() has no state file to load. If you haven’t done it yet, run saveStart() now.
Replace the temporary idle test with:
local function sprintRight(_state)
    return { Right=true, B=true }  -- hold Right and B (run) every frame
end

local fitness = runEpisode(sprintRight)
print(string.format("Fitness: %d pixels", fitness))
Save and refresh. Mario should sprint right, fall into the first pit, and die. Then you’ll see the fitness score printed in the console.
Not exactly impressive, but the loop is working. Mario jumped, walked, died, and we measured his progress.
Step 9: Try multiple episodes and average
Run the same strategy multiple times to validate that the save state is working. Consistent scores across runs mean your start position and the simulation is locked in. If they vary, the save state wasn’t clean or we have a frame-stepping problem.
Replace the single-run call at the bottom with this:
local function evaluateStrategy(buttonsFn, numTrials)
    numTrials = numTrials or 3
    local total = 0
    for i = 1, numTrials do
        local result = runEpisode(buttonsFn)
        print(string.format("  Run %d: %d pixels", i, result))
        total = total + result
    end
    return total / numTrials
end

local avgFit = evaluateStrategy(sprintRight, 3)
print(string.format("Average: %.1f pixels", avgFit))
Save and refresh. You should see three individual scores followed by the average. If all three are the same (or very close), your save state is working correctly. If they vary a lot, go back and re-save the start state - timing matters.
script started
Loading save state: C:\Users\username/Documents/BizHawk/smw_start.state
Fitness: 1273 pixels
script started
Loading save state: C:\Users\username/Documents/BizHawk/smw_start.state
  Run 1: 1273 pixels
Loading save state: C:\Users\username/Documents/BizHawk/smw_start.state
  Run 2: 1273 pixels
Loading save state: C:\Users\username/Documents/BizHawk/smw_start.state
  Run 3: 1273 pixels
Average: 1273.0 pixels
Complete script for Part 2
Here’s everything in one place:
-- smw_ai.lua  -  Part 2: episode loop
-- smw_ai.lua  -  Part 2: episode loop
print("script started")

local START_STATE   = (os.getenv("USERPROFILE") or "C:/Users/Default") .. "/Documents/BizHawk/smw_start.state"
-- If BizHawk still cannot find the file, replace the line above with a full path you control using your Windows profile folder.
local MAX_FRAMES    = 60 * 60
local STUCK_TIMEOUT = 60 * 5

function saveStart()
    print("Using save state: " .. START_STATE)

    local ok, err = pcall(function()
        savestate.save(START_STATE)
    end)

    if ok then
        print("Saved start state.")
    else
        print("Save failed: " .. tostring(err))
    end
end

function loadStart()
    print("Loading save state: " .. START_STATE)

    local ok, err = pcall(function()
        savestate.load(START_STATE)
    end)

    if not ok then
        error("Could not load start state. Run saveStart() first. " .. tostring(err))
    end
end

local function readState()
    return {
        marioX       = memory.read_s16_le(0x94, "WRAM"),
        marioY       = memory.read_s16_le(0x96, "WRAM"),
        isDead       = memory.read_u8(0x71,    "WRAM") == 0x09,
        xVelocity    = memory.read_s8(0x7B,    "WRAM"),
        cameraX      = memory.read_s16_le(0x1A, "WRAM"),
        powerUpState = memory.read_u8(0x19,    "WRAM"),
    }
end

local function drawHud(st, frame, maxX, startX, stuckFrames)
    local bg = 0xAA000000
    gui.drawBox(0, 0, 120, 85, 0x00000000, bg)
    gui.text(8, 4,   string.format("X:    %d", st.marioX),       "white")
    gui.text(8, 20,  string.format("Y:    %d", st.marioY),       "white")
    gui.text(8, 36,  string.format("camX: %d", st.cameraX),      "white")
    gui.text(8, 52,  string.format("velX: %d", st.xVelocity),    "white")
    gui.text(8, 68,  string.format("pwr:  %d", st.powerUpState), "white")
    gui.text(8, 90, string.format("frame: %d / %d", frame, MAX_FRAMES), "white")
    gui.text(8, 106, string.format("maxX: %d", maxX), "white")
    gui.text(8, 122, string.format("fit: %d", maxX - startX), "lime")
    gui.text(8, 138, string.format("stuck: %d", stuckFrames), "yellow")
    gui.text(8, 154,
        st.isDead and "[ DEAD ]" or "[ alive ]",
        st.isDead and "red" or "lime")
end

local function runEpisode(buttonsFn)
    loadStart()
    local startX      = readState().marioX
    local maxX        = startX
    local stuckFrames = 0
    local deathFrames = 0

    for frame = 1, MAX_FRAMES do
        local st = readState()

        if st.marioX > maxX then
            maxX = st.marioX
            stuckFrames = 0
        else
            stuckFrames = stuckFrames + 1
        end

        if st.isDead then
            deathFrames = deathFrames + 1
            if deathFrames >= 3 then break end
        else
            deathFrames = 0
        end

        if stuckFrames >= STUCK_TIMEOUT then break end

        local buttons = buttonsFn(st)
        joypad.set(buttons, 1)

        drawHud(st, frame, maxX, startX, stuckFrames)

        emu.frameadvance()
    end

    return maxX - startX
end

local function evaluateStrategy(buttonsFn, numTrials)
    numTrials = numTrials or 3
    local total = 0
    for i = 1, numTrials do
        local result = runEpisode(buttonsFn)
        print(string.format("  Run %d: %d pixels", i, result))
        total = total + result
    end
    return total / numTrials
end

local function sprintRight(_state)
    return { Right=true, B=true }
end

local avgFit = evaluateStrategy(sprintRight, 3)
print(string.format("Average fitness: %.1f pixels", avgFit))
What to expect
- Mario sprints right and dies when he walks into the red Kuppa, three times in a row
- Three individual scores print, then an average
- The scores should be consistent across runs
Next up
In Part 3 we’ll build the sensor grid: the 13x13 tile view centered on Mario that turns the game world into a neural network input vector.
A challenge for you: modify sprintRight to also press A (jump) every 30 frames. Does that improve the fitness score? What if Mario runs?