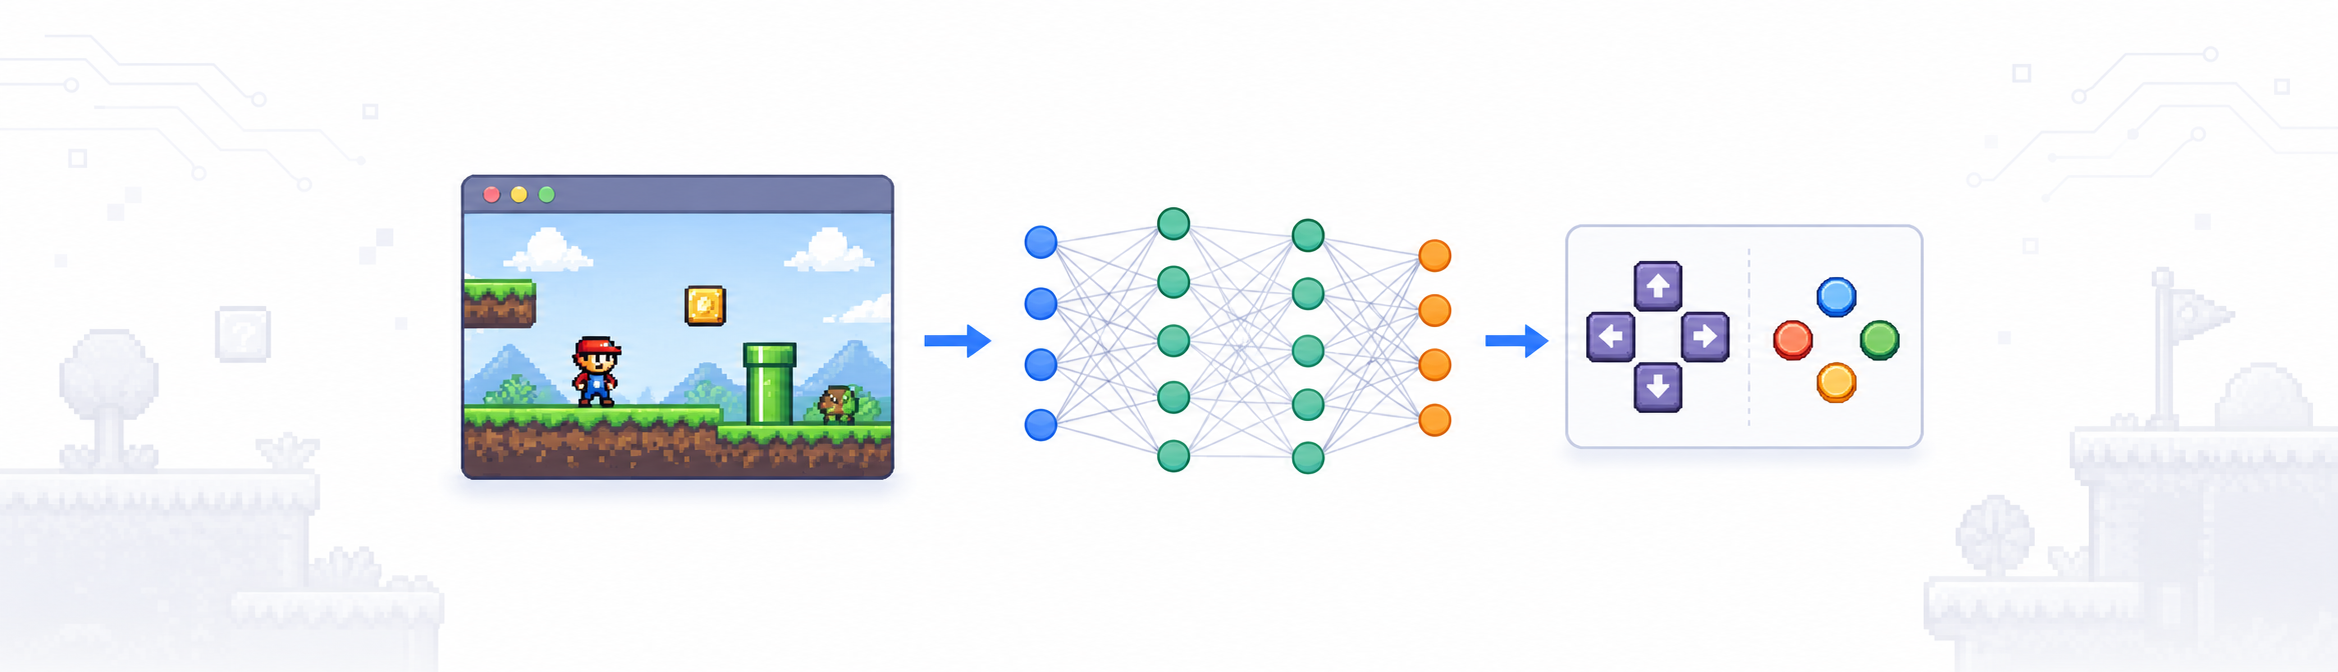
In 2015, Seth Bling released MarI/O - a neural network that taught itself to beat Super Mario World. SMW is one of my top-10 games and my undergrad thesis involved neural nets, so this project resonated with me and stayed in the back of my mind. Now, we’re going to build this from scratch.
In this series, you’ll create a self-evolving agent that learns to play SMW using Lua scripting and the BizHawk emulator. By the end, you’ll have a working AI and a runner script that loads pre-trained networks.
There’s a reason this approach is worth understanding beyond the game. BizHawk is acting as a digital twin: a simulation environment where the AI can run thousands of training episodes, fail repeatedly, and iterate fast with no real-world cost. That’s the same reason robotics and warehouse automation teams use simulation before deploying to physical hardware: you want your agent to crash in software, not into a shelf. The WRAM reads we build in this post are the instrumentation layer of that twin. Before any learning can happen, the agent needs to see the world it’s operating in.
This post is the first step: we’ll set up BizHawk, read Mario’s position directly from memory, and build a live HUD overlay that updates every frame. You’ll go from zero to seeing Mario’s coordinates on screen. Today, we’ll build a custom HUD to show Mario’s stats.
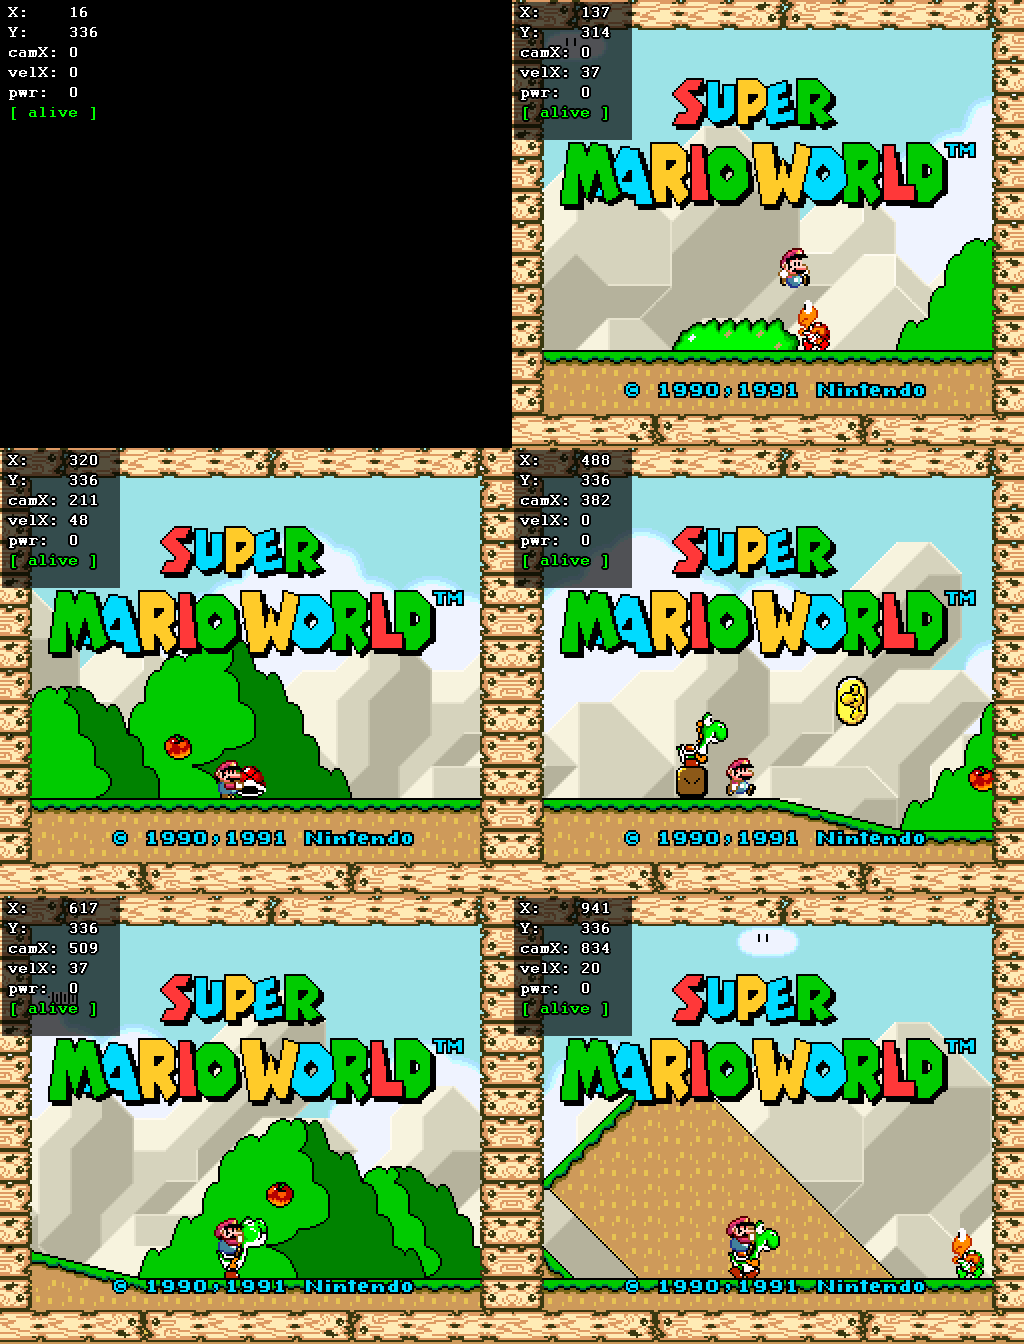
The Loop
Every frame, the agent runs the same cycle: read state from WRAM, evaluate it with the neural network, output a button press. Read, evaluate, act. That’s it.
In digital twin terms, WRAM is the sensor layer; it’s the emulator exposing the internal state of the simulated system. The neural network is the controller. The button outputs are the actuator commands. The emulator advances a frame, and the cycle repeats.
This is the same architecture you’d use to train a controller for physical hardware. The difference is that here the “hardware” is BizHawk, failures are free, and you can run the loop at 100x speed. That’s the value of the twin: compress the iteration cycle until training becomes practical.
This post starts building the first part of that loop: the sensor layer. By the end, the agent can see Mario’s position, velocity, and state.
What You Need
- BizHawk emulator: download from tasvideos.org/BizHawk. I’m using version 2.11.1.
- A Super Mario World ROM (
.sfcor.smcfile) - you’ll need to source this yourself. - A text editor for writing Lua scripts.
Install BizHawk by extracting the main archive. If the application doesn’t load, you may need to run the prerequisite installer first (prereqs_install.bat); I didn’t need to. On first launch it’ll ask for your ROM directory.
Loading the ROM
Open BizHawk (EmuHawk.exe), go to File → Open ROM, and load your SMW file. You should see the title screen. Press Start (Enter key) to advance through the overworld and enter Yoshi’s Island 2. We’ll use this level for training because:
- It’s immediately accessible from a fresh game - no need to complete other levels first.
- The starting screen is enemy-free, giving us breathing room to debug scripts and set up the AI without time pressure.
Leave the game running at the start of Yoshi’s Island 2 for now.
The Lua Console
BizHawk has a built-in Lua console at Tools → Lua Console. Click the file icon to create a new script, save it somewhere as SuperMarioWorld_ai.lua. When you save this file, BizHawk will open it in your editor of choice. If this is your first time opening a Lua file, select Notepad. Your script is preloaded with a templated script; delete this and save the file.
Scripts run alongside the emulator. They can read memory, draw on screen, inject inputs, and register callbacks. Most of the time you’ll work with two modes:
- Event callbacks - register a function that fires every frame (good for HUD drawing)
- Main loop with
emu.frameadvance()- drive the emulator frame by frame (good for training loops)
Today, we’ll use callbacks to write to the screen.
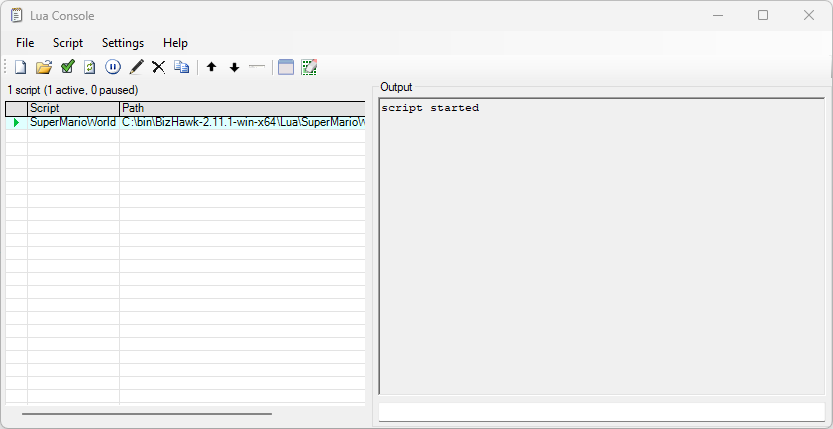 The Lua Console window in BizHawk. Become familiar with the buttons in the toolbar and the output window. This is where you’ll debug your script.
Reading Mario’s Position
Super Mario World stores Mario’s world coordinates in WRAM (the SNES’s 128 KB work RAM). Mapping the RAM addresses can be a project, but thankfully the addresses used here come from SMW’s reverse-engineered memory map, which is well-documented in the romhacking and TAS communities.
Here are the three addresses that we want to report:
| Address | Size | Value |
|---|---|---|
0x0094 | 2 bytes (s16) | Mario’s world X position, pixels |
0x0096 | 2 bytes (s16) | Mario’s world Y position, pixels |
0x0071 | 1 byte | Game state (0x09 = Mario is dying) |
BizHawk exposes memory through the memory module. The second argument to every read function is the memory domain name - for SMW use "WRAM":
local marioX = memory.read_s16_le(0x94, "WRAM")
local marioY = memory.read_s16_le(0x96, "WRAM")
read_s16_le reads a signed 16-bit little-endian integer. Mario’s X and Y are signed because the world may use negative coordinates near the left edge of some levels, and on the overworld map.
Drawing a HUD
gui.text(x, y, text, color) draws text onto the screen overlay. Coordinates are in emulator pixels (256×224 for SNES). Call it from inside a frame callback and it’ll update every frame:
-- smw_ai.lua  -  Part 1: HUD overlay
event.onframeend(function()
    local marioX = memory.read_s16_le(0x94, "WRAM")
    local marioY = memory.read_s16_le(0x96, "WRAM")
    local isDead = memory.read_u8(0x71, "WRAM") == 0x09

    gui.text(4, 4,  string.format("X: %d", marioX), "white")
    gui.text(4, 14, string.format("Y: %d", marioY), "white")
    gui.text(4, 24,
        isDead and "[ DEAD ]" or "[ alive ]",
        isDead and "red" or "lime")
end)
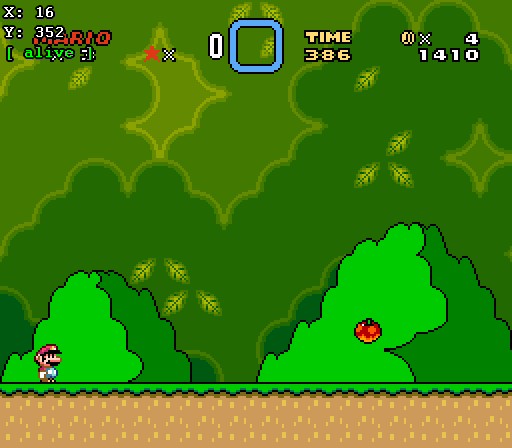
Paste this code into your Lua script, save it, then run it. You should see Mario’s coordinates updating in the top-left corner as he moves.
Note: If you change the script, remember to save your Lua file, then click the refresh button in the Lua Console: this directs the emulator to refresh the script and run with your changes.
Now, when you run the emulator, you should see 3 lines of text in the top left corner. If you’re new to scripting, play around with the numbers in the script and try to move the text to a different corner, move the lines closer together, or move them to the bottom area of the screen.
Reading More Useful Values
Let’s add a few more values we’ll need in later posts:
-- Read Mario's horizontal velocity (signed byte at 0x7B)
local xVelocity = memory.read_s8(0x7B, "WRAM")

-- Camera X position (tells us how far we've scrolled)
local cameraX = memory.read_s16_le(0x1A, "WRAM")

-- Power-up state: 0=small, 1=big, 2=fire, 3=cape, etc.
local powerUpState = memory.read_u8(0x19, "WRAM")
Updated HUD with all values:
-- smw_ai.lua  -  Part 1: complete script
print("script started")

event.onframeend(function()
    local marioX   = memory.read_s16_le(0x94, "WRAM")
    local marioY   = memory.read_s16_le(0x96, "WRAM")
    local isDead = memory.read_u8(0x71, "WRAM") == 0x09

    local xVelocity  = memory.read_s8(0x7B, "WRAM")
    local cameraX  = memory.read_s16_le(0x1A, "WRAM")
    local powerUpState = memory.read_u8(0x19, "WRAM")

    -- Draw a box around our variables
    local bg = 0xAA000000  -- semi-transparent black background
    gui.drawBox(0, 0, 60, 70, 0x00000000, bg)

    gui.text(8, 4,  string.format("X:    %d", marioX), "white")
    gui.text(8, 24, string.format("Y:    %d", marioY), "white")
    gui.text(8, 44, string.format("camX: %d", cameraX),"white")
    gui.text(8, 64, string.format("velX: %d", xVelocity), "white")
    gui.text(8, 84, string.format("pwr:  %d", powerUpState), "white")
    gui.text(8, 104,
        isDead and "[ DEAD ]" or "[ alive ]",
        isDead and "red" or "lime")
end)
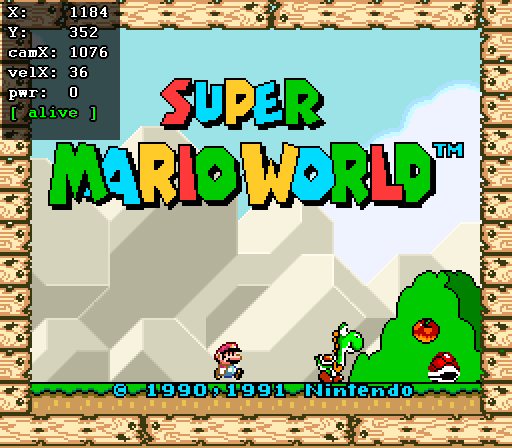
Paste this into your script, save, and refresh it in the Lua Console.
Try It
With the script running, walk Mario around. You should see:
- X increasing as Mario moves right, decreasing left
- Y increasing as Mario falls (SMW uses screen-down-is-positive for Y)
velXshowing positive values when running right[ DEAD ]in red when Mario dies- If you walk left, velX is negative; moving right makes it positive.
If you leave this script running while the title screen plays, or while you’re on the overworld, it will still accurately report Mario’s state.
Next Up
In Part 2 we’ll take control of Mario from Lua, build the episode loop (save state → run → measure fitness → reset), and establish the structure every subsequent post will build on.
A challenge for you in the meantime: can you modify the script to show if Mario is in the air? Or if his way forward is blocked by the level map?
One thing worth noticing before you move on: everything in Part 2 - the training loop, the fitness function, the inputs the network will learn from - depends entirely on what we built here. An agent is only as good as the state it can observe. That constraint shows up in production systems too. If you’re building a model to optimize a physical process, the first question is always what data you can actually read from the running system. We happened to get lucky with SMW; the TAS community reverse-engineered the memory map for us. In production, that work usually falls on you.